

Connecting Your Site
DontBreak tests your site from the outside, like a real visitor — there's nothing to install on your server. "Connecting" your site just means giving a test a URL it can reach, and configuring access (like HTTP basic auth) if your environment is protected. This page covers URL requirements, authentication at the test and suite level, and how to handle staging versus production.
Test URL requirements
Every test starts at a Test URL, set when you create the test (it can't be edited afterwards, so pick the right environment up front):
- Both HTTPS and HTTP URLs work. If you type a URL without a protocol,
https://is added automatically. - The URL must contain a valid domain with a TLD (e.g.
example.com) — bare hostnames likelocalhostwon't validate. - The site must be reachable from the public internet. DontBreak's cloud browsers can't reach sites on your local machine or inside a private network. For protected staging environments, use basic auth (below) or allowlist access.
- If the site sits behind Cloudflare, AWS WAF, or similar bot protection, add a skip rule keyed to a secret custom header — see Testing Behind Bot Protection.
- If the test belongs to a test suite with a default URL, the test URL must be on the suite's domain — and you can leave it blank to inherit the suite's default URL.
HTTP basic auth
If your staging site sits behind HTTP basic authentication, store the credentials with the test and DontBreak will authenticate automatically on every run.
Per test
Open test settings
In the composer, open Test → Settings, or use the settings action on the test page. Go to the Authentication tab.
Enable Basic Authentication
Toggle Enable Basic Authentication, then enter the username and password. The tab shows an "Enabled" badge once configured.
Save
Click Save Changes. Runs on every browser and device will now authenticate with these credentials.
Per suite
For a whole environment, set credentials once on the test suite instead: open the suite's settings, go to Authentication, and enable basic auth there.
- New tests created in the suite automatically inherit the suite's credentials.
- For existing tests, check Apply to all existing tests in this suite when saving — this overwrites every test's credentials with the suite's. Leave it unchecked to only affect newly created tests.
- When creating a test in a suite that has basic auth configured, the Create New Test dialog notes that the credentials will be inherited.
Staging vs. production
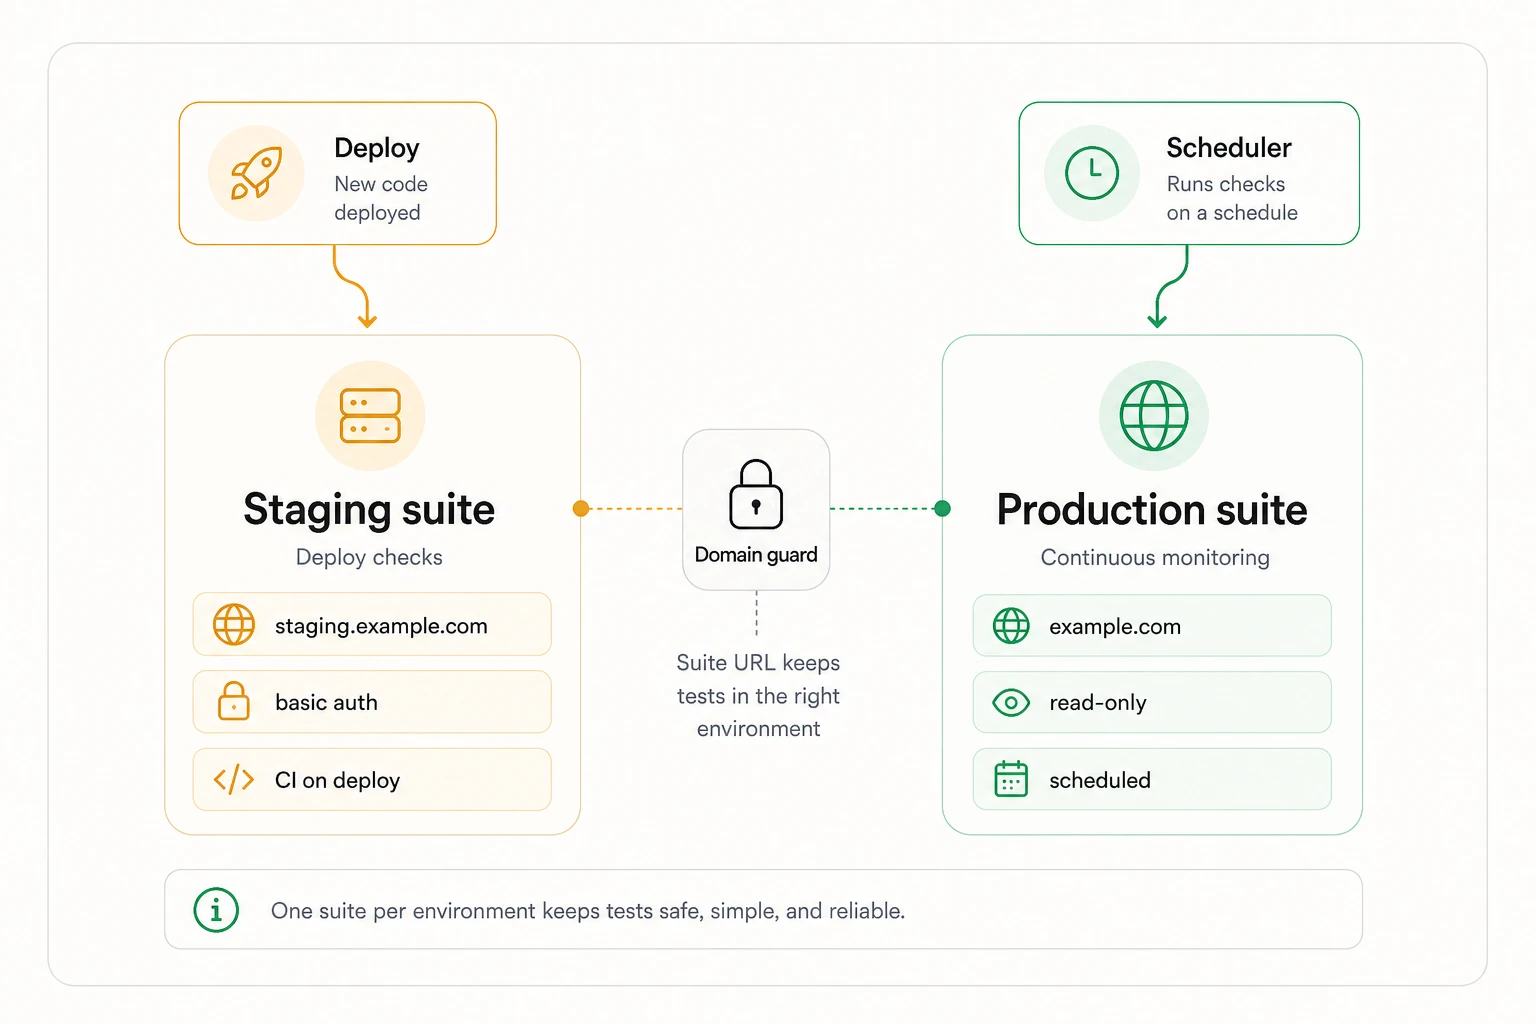
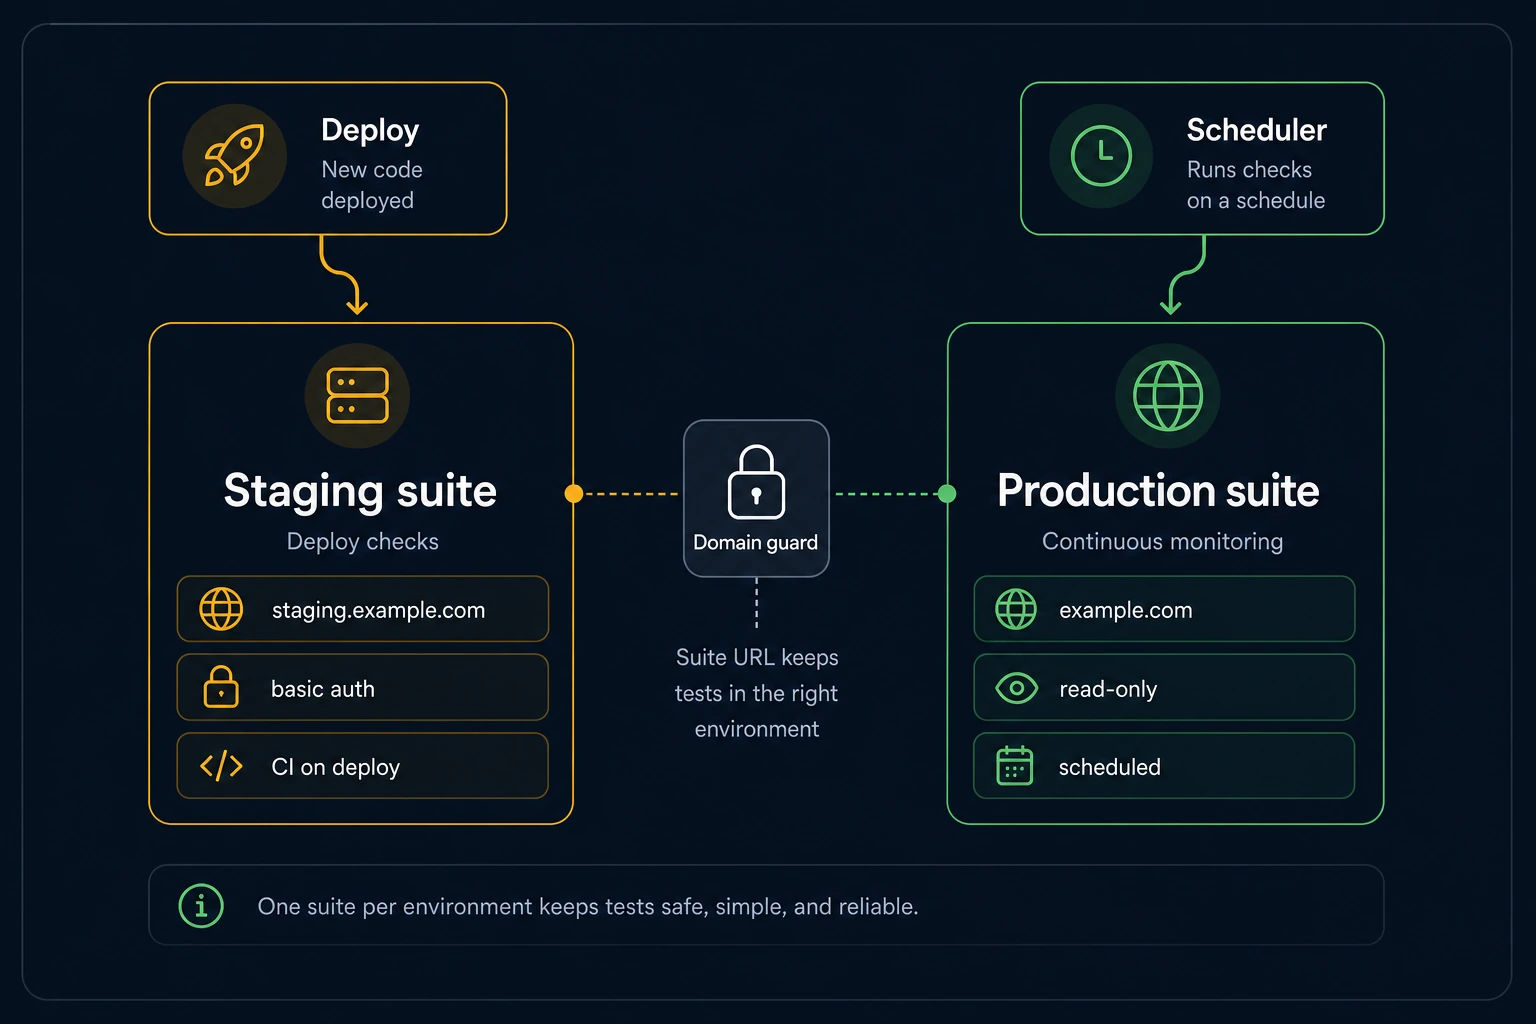
A clean setup is one test suite per environment:
- A staging suite with your staging domain as the default URL and the staging basic auth credentials. Run these on every deploy via CI/CD.
- A production suite with read-only smoke tests, run on a schedule as uptime-style monitoring.
Because a suite's default URL locks its tests to that domain, you can't accidentally point a staging test at production.
Be careful testing production
Tests perform real actions in a real browser. On production that means real form submissions, real emails to real addresses, and — if your test completes a checkout — real orders. Keep production tests read-only (navigation and assertions), or test destructive flows on staging. For signup and verification flows, use DontBreak's temp email inboxes instead of real addresses.
Cookies, banners, and sessions
- Cookie banners — DontBreak auto-dismisses most cookie consent banners; the Auto-dismiss cookie banners option in test settings is on by default for new tests and handles the common consent managers. Fully custom banners may slip through — if one blocks your steps, dismiss it explicitly with a Click step or pre-set the consent cookie with Set Cookie.
- Cookie-based setups — use the Set Cookie action to set a cookie before your steps run, e.g. a feature flag, a consent cookie, or a session token. See Interactions.
- Login flows — for testing authenticated areas of your app (form-based login, not HTTP basic auth), see Testing login flows.
Next steps
- Creating Your First Test — point a test at your site
- Test settings — timeouts, platforms, and advanced options
- CI/CD integration — run your suite on every deploy